本教程详细讲解如何使用CH340或FT232等USB转TTL设备,通过UART端口实现PIC16F877A单片机与PC的通信,并利用MikroC进行编程,适合入门学习。2024年12月发布,时长2小时24分。
原始标题:Usb To Ttl Device Interface Pic16F877A With Mikroc Tutorials
Published 12/2024
MP4 | Video: h264, 1920×1080 | Audio: AAC, 44.1 KHz
Language: English | Size: 2.17 GB | Duration: 2h 24m
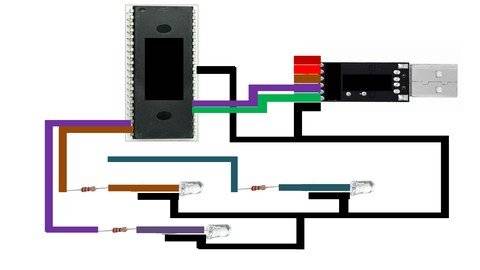
USB to TTL devices like Ch340 or FT232 interface with PIC16F877A to be used as either input or output source or both.
What you’ll learn
You will learn how to interface a PIC16F877A microcontroller with a Computer using UART port with USB to TTL device.
You will learn how to establish a communication between PIC microcontroller and Laptop/PC using USB to TTL device like CH340, FT232 or any other.
You will learn how to intialize and program UART port of PIC16F877A microcontroller using MikroC for PIC to interface with a PC.
You will learn how to use a PC/Laptop as a source of input or output device with a PIC16F877A microcontroller using USB to TTL devices.
Requirements
Beginners can learn having intrest in developing useful products in the future.
Overview
Section 1: An introduction to PIC16F877A microcontroller.
Lecture 1 Introduction to PIC16F877A microcontroller.
Lecture 2 Introduction to pins and ports of PIC16F877A microcontroller.
Lecture 3 How to use PIC16F877A datasheet.
Lecture 4 Setting up PIC16F877A microcontroller.
Section 4: USB to TTL device interface with PIC16F877A tutorials.
Lecture 7 Sending strings from PIC16F877A to PC using USB to TTL device.
Lecture 8 Establishing full duplex communication b/w PIC and PC using USB to TTL device.
Lecture 9 Read Temperature from LM35 and display it on PC using USB to TTL device via PIC.
Lecture 10 Detecting sound using PIC16F877A microcontroller and display result on PC.
Lecture 11 RDM6300 based RFID card reader with PIC16F877A and output on PC using USB to TTL
Lecture 12 Send text from PC to PIC to 20×4 LCD.
Beginners with intrest in making embedded products.
此处内容需要权限查看
会员免费查看