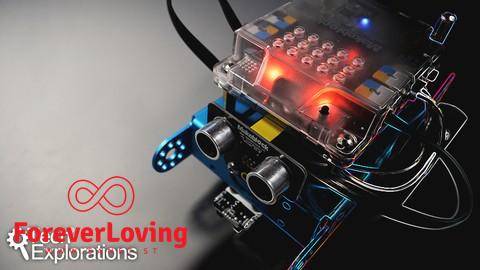
学习使用全球最友好的教育机器人mBot,通过Scratch编程控制传感器与执行器,适合Arduino和机器人初学者。
原始标题:Arduino Robotics With The Mbot
Last updated 10/2019
MP4 | Video: h264, 1920×1080 | Audio: AAC, 44.1 KHz
Language: English | Size: 9.02 GB | Duration: 4h 48m
An introduction to robotics with the world’s friendliest learning robot
What you’ll learn
Program the mBot on the tablet device
Program the mBot on the PC
Use the mBot sensors and actuators
Program the mBot using the Scratch language
Come up with your own fun experiments for the mBot
Overview
Section 1: About this course
Lecture 1 What is this course about?
Lecture 2 Hardware and software that you will need
Lecture 3 Study guide
Section 2: Meet the mBot
Lecture 4 Introduction
Lecture 5 Parts in the box
Lecture 6 Assembly: Chassis, motors, wheels, sensors
Lecture 7 Assembly: mCore tour, Bluetooth module
Lecture 8 Assembly: Wiring, batteries, controller
Lecture 9 Assembly: testing
Lecture 10 Additional hardware
Lecture 11 Software options
Section 3: Programming the mBot using a tablet
Lecture 12 Introduction
Lecture 13 Demonstration of MakeBlock
Lecture 14 Demonstration of mBlockly
Lecture 15 Demonstration of mBlock
Section 4: Programming the mBot on the PC using mBlock
Lecture 16 Introduction
Lecture 17 Install mBlock on your computer
Lecture 18 A quick look at Scratch, the graphical programming language
Lecture 19 Create and upload your first program
Lecture 20 Motor control
Lecture 21 Moving left, right, backwards
Section 5: Getting more out of the mBot: programming structures, more sensors
Lecture 22 Introduction
Lecture 23 The Loop
Lecture 24 The distance/proximity sensor
Lecture 25 More experimentation with the distance sensor
Lecture 26 The “If” and “If…else” control structure
Lecture 27 Introducing the buzzer
Section 6: Create the line follower program
Lecture 28 Introduction
Lecture 29 Introducing the line sensor
Lecture 30 Adding the motors to the line follower program
Lecture 31 Stopping at the end of the line with the proximity sensor
Lecture 32 Implement a U-turn at the end of the line
Lecture 33 Using a button to start and stop
Lecture 34 Creating custom block (functions)
Section 7: Other things you should know
Lecture 35 Introduction
Lecture 36 Restoring the firmware (so that you can control the mbot from the iPad)
Lecture 37 Restoring the default program (so that you can control the mbot with the remote
Section 8: Mini project
Section 9: Conclusion and Bonus Lecture
Lecture 38 What’s next?
Lecture 39 Bonus Lecture
School students and homeschoolers interested in robotics projects,Teachers, interested to learn skills for a STEM class,Electronics hobbyists looking for a gentle introduction to robotics,Parents looking for a fun educational activities to take with their children
此处内容需要权限查看
会员免费查看